Automatically translated from Dutch by AI. Read the original
Formwork
From the first spade in the ground for the frost footing to formwork all the way round
The ground was clear of trees and slabs, so the digging of the trenches for the frost footing could begin.
Ordering materials
Because it would be single-use formwork, I chose the cheapest timber that works for formwork, and that’s OSB. I had my father deliver B-grade from Bouwie with a van. I ordered the rest of the timber and reinforcement from Jac Klijn just round the corner from me.
Setting the datum level
For the datum level I started calculating from ground level — in this case the height of the patio. First, how high the top of the floor is relative to ground level, and then working through all the layers (floor finish -> screed -> insulation -> floor slab -> frost footing). 0 is then the top of the floor finish, and I marked +430 on the wall as a reference line. You often put the line slightly higher simply because you want it at a comfortable working height.
From the course I knew various ways to transfer level lines, for example with a transparent hose. I did it once, because it was cool to try. Straight afterwards I treated myself to a laser, because it’s going to come in handy for the rest of the build.
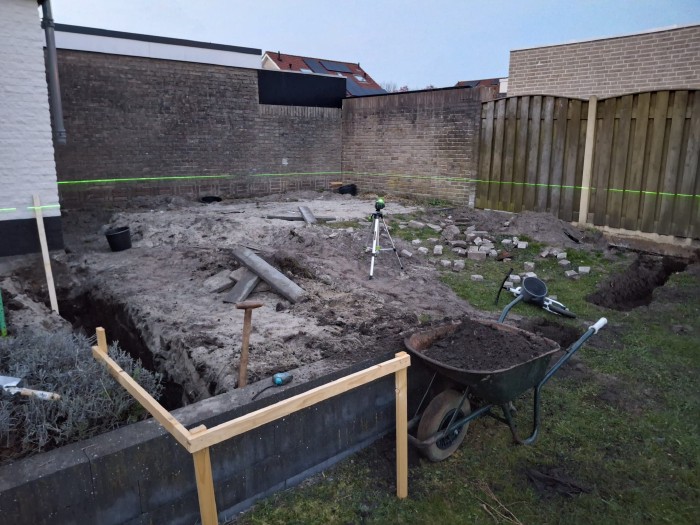
Digging trenches and setting the first stretch of formwork
For a large part I was going to pour against existing walls, and for the formwork I would work from the corner of my garage to the neighbours’ fence. Pretty much without thinking, I started digging a very wide trench, in which I’d planned frost footing | formwork | braces all in the trench. I’d asked my uncle to help me at the start, and he said straight away that it could have been done much more easily. I wouldn’t have needed to brace it at all if I’d only dug out the frost footing. A minor setback and quite a bit more work because of it, but hey — swallow it and carry on.
Before my uncle came I’d already looked at the square building lines and made a start on the batter boards. We measured parallel to the garage to the corner in the garden and then on to the fence. I was very precise here because I didn’t want it to look visually out of square with the garage. After setting out the lines with the laser we also measured the diagonals, and they were the same too. I believe Henrie from the course mentioned it several times: four eyes, and check in a different way from how you set it out. Another alternative is a builder’s square (Pythagoras and the 3-4-5 ratio).
Once the lines were in place, we used a spirit level against a batten to drive stakes plumb into the ground. First straight down into the ground and then at the height of the underside of the frost footing. This is a trick for letting the formwork rest level on those battens without spending the whole time moving soil in and out.
I then started cutting an OSB strip and, with the first one, had forgotten that it was B-grade and absolutely not straight. A bit of planing and it was workable. A 44x70 spruce batten along the top and bottom, and then the whole length from the corner of the garage to the garden set on the stakes, stood upright with the spirit level and braced with some battens. Then round the corner in the same way, and it was already late afternoon.
It was a fun and educational afternoon, because it makes an incredible difference to have a second pair of eyes, especially when they have a lot of building experience. Besides, it’s always nice to spend an afternoon pottering about with your uncle.
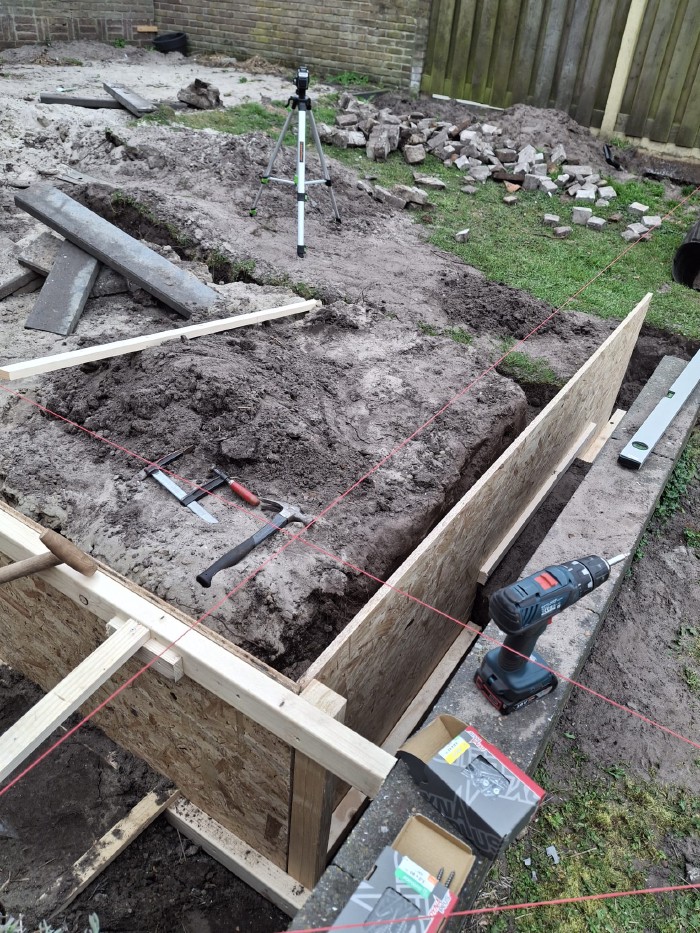
Filling the height difference
After that afternoon part of the formwork was in place, and I had to dig out the rest of the frost footing and level the rest of the ground to the underside of the floor slab. This was actually better, because I could still drive the wheelbarrow back and forth without formwork getting in the way. While digging, so many old bits of stone came up that I used as many as possible to raise the sloping section that needed filling. Then I threw all the surplus sand on top and spent days watering it in, because I wanted to be sure it wouldn’t settle much more.
Why dig everything by hand anyway?
Several people told me: ‘just hire a mini digger and you’ll be done in an afternoon’. I myself reckoned I’d need an afternoon just to practise. Then a few more days of digging, and later having to hire the digger again for the pipework. Several days of hire and fuel versus getting physically stuck in every day. As an office worker, I rather liked the idea of the latter. So to be on the safe side I went with the shovel, with the added benefit that I got a bit stronger for the rest of the build. Going outside for an hour at a time to dig was very doable. Especially when it’s sandy soil and you’re used to clay back home.
I knew from ‘Grand Designs’ and ‘Ik Vertrek’ that it’s really different for a body from controlled exercise in a gym. I don’t have figures, but I’ve seen plenty of nasty injuries happen. Tendons are loaded very differently and injuries creep in very easily. An underrated topic if you ask me. Trained tradespeople don’t know what you’re talking about, because they hardly suffer from it, and the rest almost never deal with it because they simply never do it. I know better by now and try to avoid having to carry on with a brace or a sling.
Finishing the frost footing and formwork
The trench also ran along the concrete posts of the fence, and these would 100 percent fall over if I just dug a trench next to them. So I hopped on my bike to Jac Klijn to fetch a 5-metre beam and used it to hold this post in place against the wall and another concrete post. At the bottom I later also braced it below the level of the frost footing and just left it there.
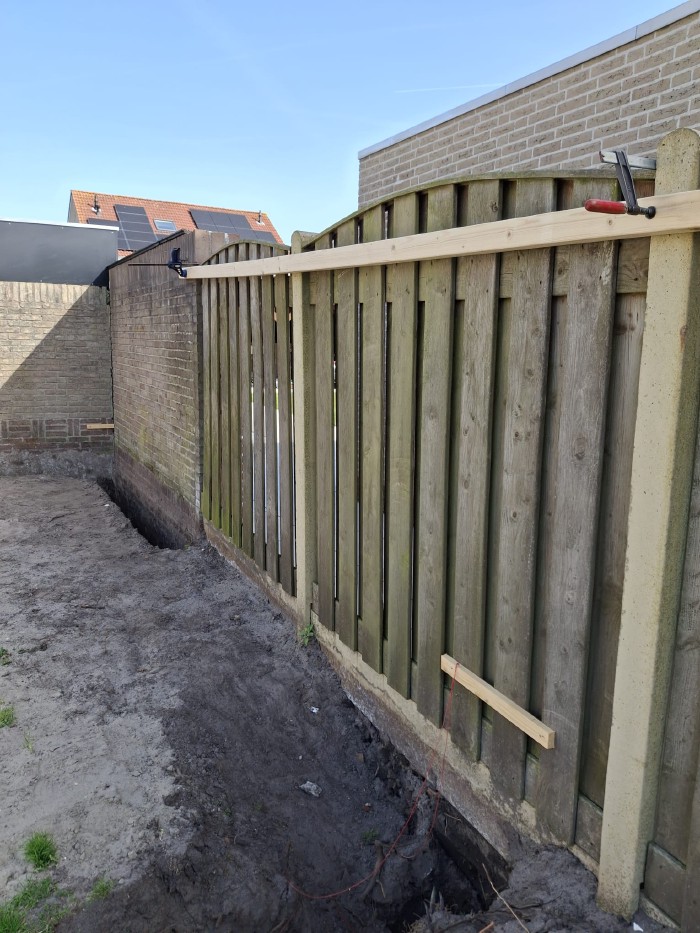
The rest of the frost footing went fairly smoothly, and I could finish the rest of the formwork. No more crazy things after that, and the formwork was done. Or so I thought….
Bracing the formwork properly
The first photo is the formwork before it was checked by a second and third pair of eyes.
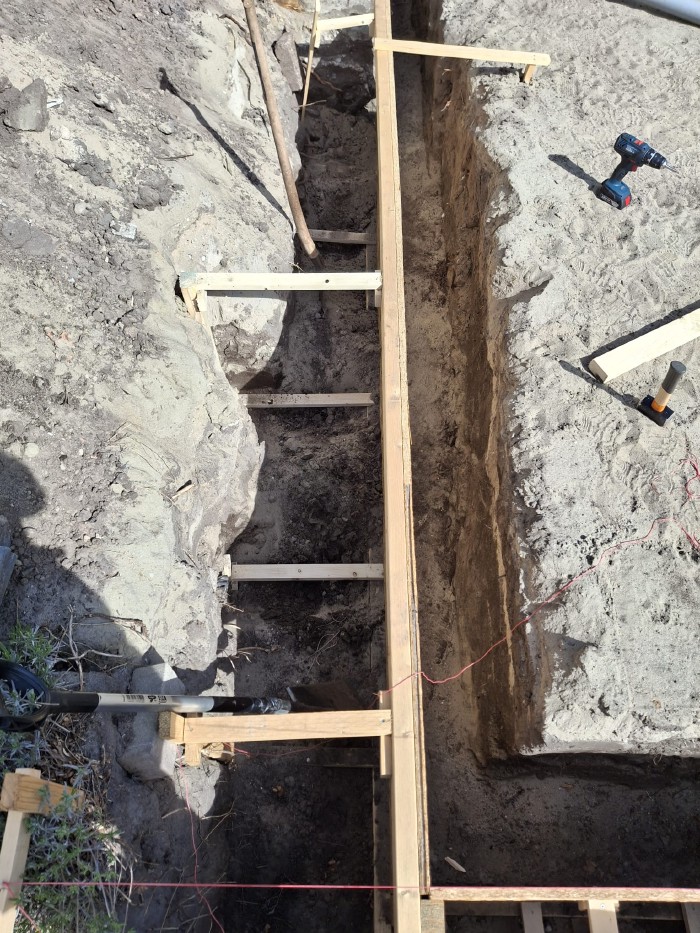
The second photo is the formwork after Henrie from the building course and my uncle had said it needed almost twice as much. Both gentlemen also reminded me of the pressure at the bottom, which would be greatest while pouring the foundation. 1 in 10 foundations bursts out, and then you’re really in trouble. Braces at least every 500 mm, top and bottom.
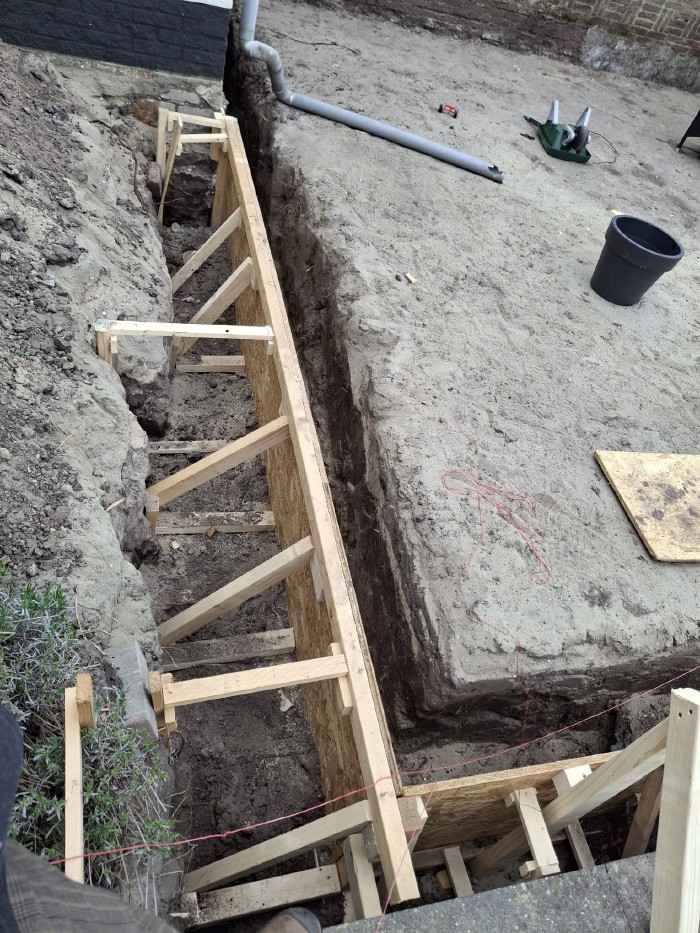
I’d run out of roofing battens but still had plenty of 44x70, so I used those to make it sturdier. That worked, because I could really push against it with my full weight with my foot without it wanting to move outwards anywhere along the formwork. That was also the test Henrie showed during the course.
The formwork is now finished.