Automatically translated from Dutch by AI. Read the original
Pipework
Sewer, water and electrics in the ground
Preparations
Connections
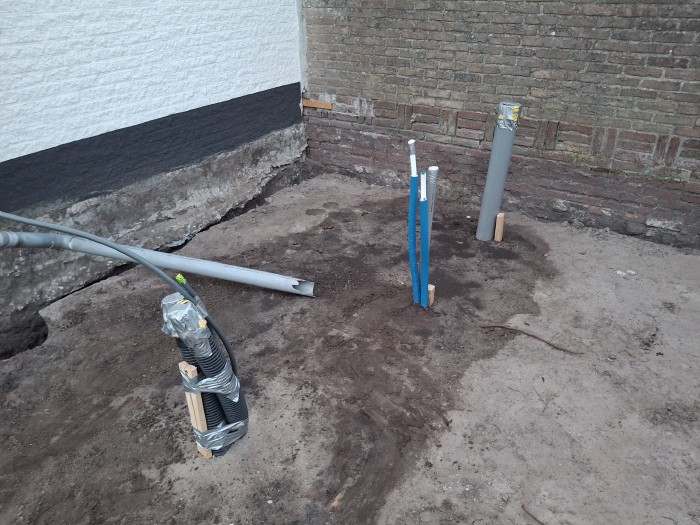
The formwork was ready; it was time for the building’s water, electrics and drainage. I wanted to take the opportunity to run electrics/water to the garden and lay ducts for internet and unforeseen future needs. This should be the last time the ground has to be opened up for anything. In 8 years it has already been dug up twice before, for a hob and for solar panels.
Advice
For advice on this subject I didn’t have to look far: my father is an electrician and half a plumber. I told him roughly which equipment will go into the garden office (air conditioning, mechanical ventilation, no central heating, computers/servers, pool pump). When he first started talking about a separate cupboard for it, I initially wanted to fit it into a kitchen cabinet to tuck it away somewhere. That wasn’t an option, and we also considered moving the technical cupboard to the garage. In the end we chose to use a small wall by the kitchen unit. We also thought it would be handy to run the garden’s electrics/water/ducting via the garden office. So water/electrics/ducting come up and go straight back into the ground towards the garden. That way you can use the garden office’s consumer unit, and a main stopcock for the garden is much closer too.
Drainage:
- Toilet - 110mm with an 87-degree bend upwards
- Kitchen - 40mm vertical - 50mm horizontal
Calculating locations
For the locations of the sewer, water and electrics I started measuring from the wall and looked up standard dimensions for toilets and kitchen units. I did measure our current kitchen and toilet and compared them with how the space feels. For the toilet, for example, I went a bit wider because I find 90 centimetres very cramped. With these dimensions and those of the air cavity, outer walls and inner walls, I calculated the locations. It can always be adjusted a bit, because water is easy to move within the wall; the drainage is a bit trickier.
Buying bends
This is where things went a bit wrong in my head. Somewhere I’d picked up the idea that I had to leave the building roughly parallel to the garage. At Hornbach I could only find 45- and 30-degree bends, and that wasn’t going to work. After a lot of mental contortions and puzzling, I happened to have my friend and landscape gardener on the phone, and he said: ‘just go out of the building in a straight line, then you also have the fewest connections in the concrete and less can go wrong. Oh, and for everything else you can find almost any bend, and push-fit joints are easier’. Well, that made it a lot simpler straight away!
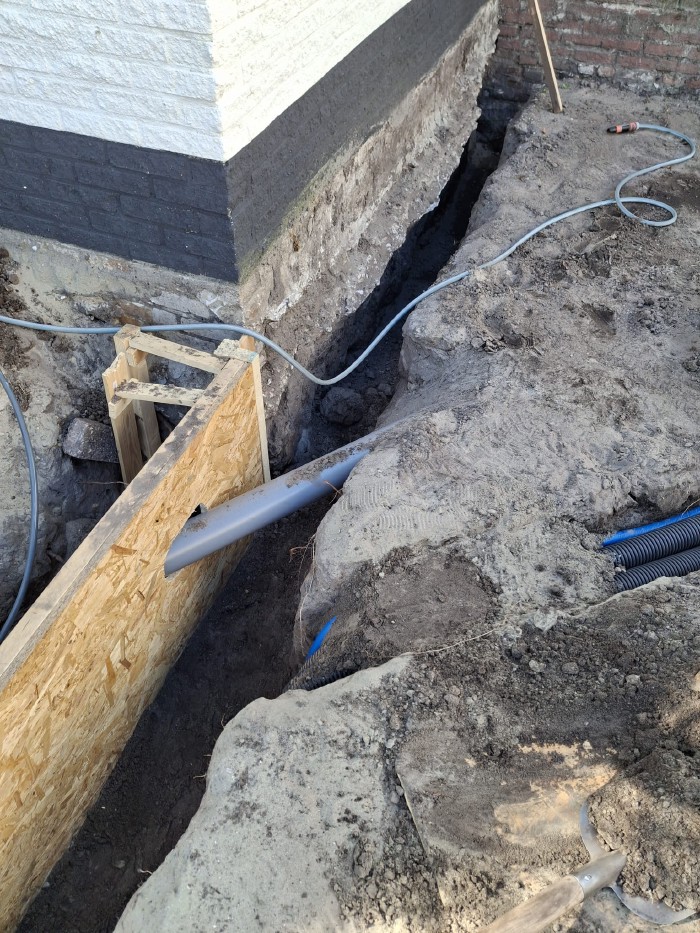
An 87-degree bend upwards, horizontally a 110mm pipe with a Y-piece in between branching to 50mm for the kitchen drain. For the kitchen another bend upwards and a reducer to 40mm, and we’re ready for the foundation.
Digging and bends
I laid all the connections in trenches with another 15-20 cm of soil on top. The sewer slightly deeper and to a fall of 1 cm per metre. I think that took me a good afternoon. For the fall of 1 cm per metre, I’d checked on my spirit level how far that was off level, and measured it that way.
I did my shopping at Hornbach (really by far the cheapest for this) and had to make do with push-fit joints, but also a glued joint for the 50mm bend. At 5 pm on a Sunday I was busy with the push-fit joint, had done something wrong and the joint had to come off. With a big dollop of Vaseline it had slid on in no time, but getting it off seemed utterly impossible. Greasy hands, a towel getting ever greasier from the Vaseline, and attempt after attempt. Hornbach closed, so no way back. In the end it popped off, but what a stress that was! If you do everything right first time it works brilliantly, I thought to myself.